2018-05-21

#Capture by Sabee for 2Crafty

Hello 2Crafty Fans,

It is now the moment to reveal my second may Inspiration. At the end of this blog post, you'll find a video tutorial that shows how I did my layout. I really like the mischievous look my son sometimes make and I was able to capture it on photo for the first time. Thus came the inspiration for my "Capture" layout.


This shot is a highlight of the left cluster of chipboard that includes "Triangle Clusters", "Parisian Border" and, in dark brown, the chipboard support that was holding the "Messy square frame" chipboard (let's not waste perfectly good material!).

For the "Messy square frame" chipboard support, I used brown embossing ink and then applied black ink on top.

For the "Triangle Clusters", I used red-gold embossing powder and then inked it with a black ink.

For the "Mini #Word Set 2", I used midnight-brown embossing powder.

For the "Parisian Border", I inked them with a brown ink and then I applied black ink.

For this layout, I used the following awesome 2Crafty chipboard:

Mini #word set 2
MB018
Parisian Border
DB0039
Corner Lorena
CR0056
Triangle Cluster
M00720
Messy Square Frames
FR0085

Here's the video showing how I built that layout:

Thanks for joining me for this layout, I hope this gave you new ideas! I look forward to hear from you guys! See you next month for more inspirations!


2018-05-09

This boy 2Crafty

Hello 2Crafty Fans,

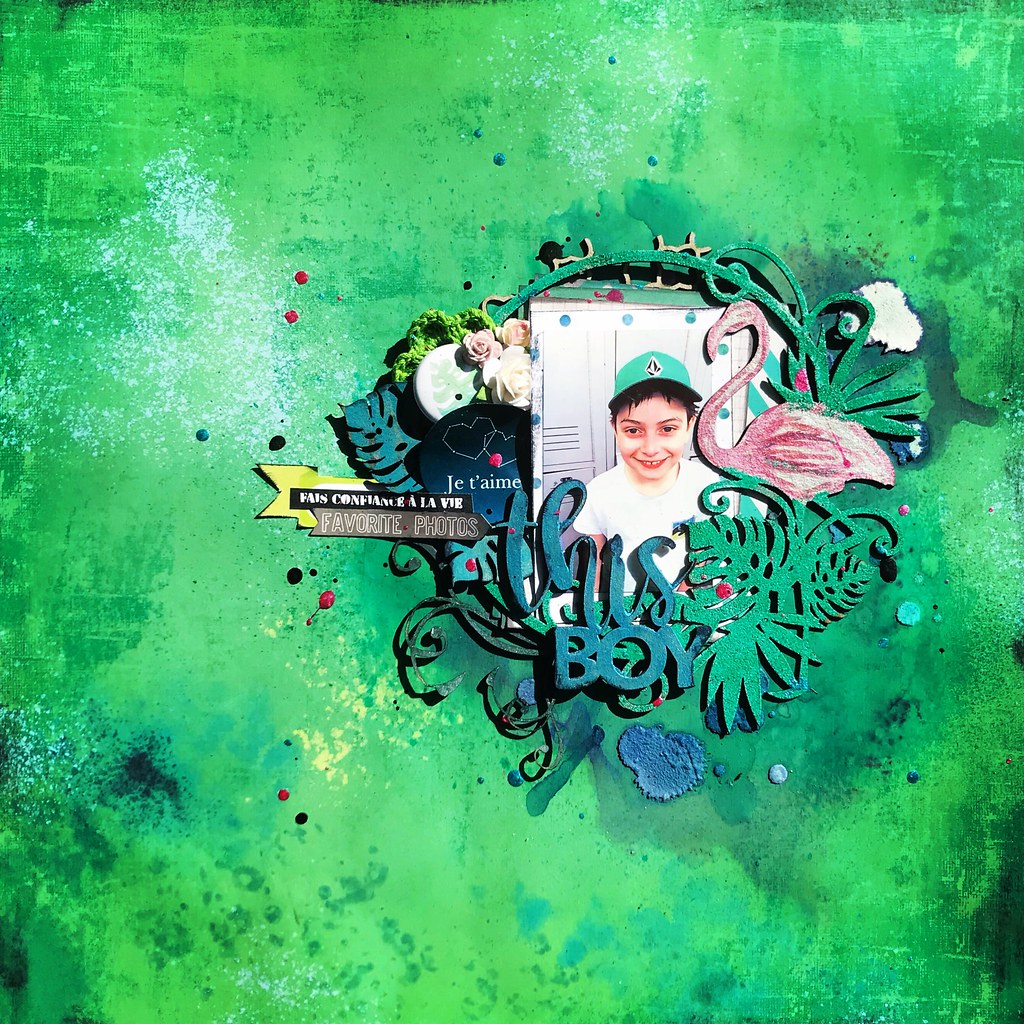
It is time to reveal my first layout of the month. In Canada, it is spring time and we are actually seeing the sun peeking out for the first time, so it inspired me to do a green layout! This one showcases my son Liam fresh out of his swimming training.


Here we can see the beautiful leaves of the Flamingo frame set. I've prepared them with turquoise embossing ink and I painted the Mini Flourish Bits with silk green paint and placed them underneath the Flamingo frame set.

For the This Boy title, I used some metalized blue paint, applied with my finger. That's what gives it this nice uneven look.  

This is another shot focusing on the Mini Flourish Bits.

Now, for the masterpiece of the Flamingo frame set, I first painted the flamingo with metallic silver paint. Then I used two kind of pink inking pens to draw the feathers. Then I used a black inking pen to draw the feather highlights. For the rest of the Flamingo frame set around the flamingo, I used some green embossing powder.

For this layout, I used theses 2crafty Chipboards
FR0108 Flamingo Frame set 6"
W00425 This Boy
M00722 Grid bits
MB006 Mini Flourish Bits


I hope that you'll be inspired by this colorful mix. And don't be afraid to give your boys layouts a touch of pink! It'll bring out some more cheerfulness! 

That's all for today! See you soon for my second reveal of May.


2018-05-07

Chronique Simple à souhait: Rêve

Salut les cocos,
J'espère que vous allez bien. Je suis de passage sur le blog pour vous présenter ma réalisation du mois. J'ai utilisé un combo-couleurs printanier qui met en vedette mes produits fétiches de Simple à souhait. D'ailleurs, n'ayez pas peur de mixer les couleurs, il suffit de rester dans les mêmes tonalités. Pour cette page présentant ma fille, j'ai mélangé le rose, le jaune et le noir-gris.
Afin de réaliser ma création, j'ai utilisé plusieurs produits des Étampes Simple à Souhait.
Tout d'abord, j'ai utilisé un mot des autocollants en mousse  "Famille" d'Accent Scrapbooking" par Simple à souhait. Ce sont de superbes idées de titres de pages.
Pour créer un motif à mon fond de page, j'ai utilisé une étampe de la planche Point

Le sentiment de ma page provient de la planche d'étampes Mots Large #2
De plus j'ai utilisé quelques produits de la cie Accent Scrapbooking tels que: 


J'ai aussi utilisé un chipboard de la compagnie 2Crafty que vous pouvez retrouver sur le site de compagnie.


C'est tout pour aujourd'hui! Merci d'être passé et surtout, amusez-vous!
Sabee


2018-04-22

-2Crafty April Inspiration-

Hello 2Crafty fans,

It is my turn to share my projects for April.
My first project puts my hubby and I in the spotlight.
 Even after 18 years together, we're still in love. 

"Love is in the Air"


For the title, "Love is in the Air", I used a gold embossing powder
 which really makes the text stand out.


I applied a pink metallic embossing enamel on the "Ava's Frame"
 that blends well with the background.


I first painted the "Climbing rose bush" with a black matte paint.
 When dried, I applied a gold embossing ink.


I used a silver metallic paint on the "Fancy Damask", diluted with water. 
Then, on top of the paint, I applied a pink embossing ink.

For this project, I used the following awesome chipboards:
Ava's Frame (FR0096)
Climbing Rose Bush (DB0100)
Fancy Damask (M00564)
Love is in the Air (W00418)


"Family Forever & Always"

The second project I want to show you today is quite special for me. I did the 
"Family forever & always" layout as a gift for a close friend, hard-working
 mom of three that just graduated from university.


On the "handdrawn feathers", I applied a red-gold embossing powder.


To give this nice rusty look to the "Hearth Clumps", I used a red ink,
 then applied some gold-copper embossing ink on top.


Finally, on the title "Family forever & always", I applied a white-pink embossing enamel.

For this layout, I used the 2Crafty Chipboards:
Handrawn Feathers (M00588)
Heart Clumps (M00576)
Family Forever and always (W00125)
That's all for this month! I hope these inspire you to create as much
 as I had fun doing them for you! See you next month!