Showing posts with label scrap fimo. Show all posts

2020-03-21

Once Upon a dream

Hello 2Crafty fans!

I hope you're doing well! On our side, spring time has officially started here in Quebec and snow is finally melting away and we're starting to enjoy a bit of warmth. Things took an unexpected turn for us a few days ago when everything shut down due to the pandemic and everybody being asked to stay home. But we're making the most of it, spending some quality family time together. It also means I have a bit more time for crafts!!!

"Once Upon a Dream"


On the "Ornate Heart Set", I applied some shimmering rose gold paint. Then I dabbed a pink ink on top.


For the "Scroll 3", I used burgundy embossing powder, then applied a bit of copper embossing ink on top. Finally, I've added just a tiny bit of white embossing ink.


For the title, "Once Upon a Dream", I applied copper-pink embossing enamel.


I used the following 2Crafty chipboards in this layout.

Ornate Heart Set [m00500]
Once Upon a Dream [w00467]
Scroll 3 [pa0043]


That's all for me today! I hope you enjoyed this and that it gave you a bit of inspiration for your own creations! Stay safe, I'll be back soon with more ideas to share with you guys.


2019-10-21

"Live Laugh Love" pour 2Crafty

Hello 2Crafty fans!

Last week-end was pretty exciting for me as I was celebrating my birthday with a great bunch of friends and my family! To kick off the celebrations early, I decided that I would indulge a bit and prepare a layout featuring my own face juuuust before I get older again!

I'm pretty happy about the result, especially with the chipboards on which I tried a few new techniques.

"Live Laugh Love"


I hand-applied wax on the "Flourish Adornment Set 6" chipboard and inked the borders with black ink.


For the "Frame Celia's Flourish", I applied black paint, waited for it to dry, then applied rose-gold paint. I applied pink embossing ink on top and finally inked the border in black.


On the "Dianne's doily set", I applied white-pink embossing enamel. For the title, "Live Laugh Love", I used bronze embossing enamel.

I used the following 2Crafty chipboards in this layout:
Frame Celia's Flourish [FR0048]
Flourish Adorment Set 6 [PA0048]
Dianne's Doily Set [M00586]
Live Laugh Love [W00223]


That's all for me today! I hope you enjoyed this layout and it gave you some inspiration for your own creations! I'll be back soon with more ideas to share with you guys!


2019-07-09

"This is me" pour 2Crafty

Hello 2Crafty fans!

Summer is in full swing now in Quebec and I was in a particularly cheery mood last week as I was spending plenty of time outside in the sun. I took a selfie that I think did a great job of capturing my mood and decided to create a new layout with it.

"This is me"


For the "Sharon's Butterflies" in the back, I used pink embossing ink and traced the contour with black ink.


On the "5" flora frame", I first applied teal paint, then added some diluted blue metallic paint on top. Then I dabbed some pink embossing ink on top of the other coats.


On the "Lattice Leaves", I applied teal paint, somewhat giving a metallic look.


For the title, "This is me", I used pink metallic paint as a stain, then inked the border with black ink.

For this layout, I used the following 2Crafty chipboards:
5" Floral Frames [FR0055]
Lattice Leaves[ M00589]
Sharon's butterflies [M00496]
This is me [W000351­]


That's all for me today! I hope this will give you ideas for your own creations. I'll be back soon, still in a very cheery mood with more ideas to share with you! See you soon.


2019-06-09

"Handsome" pour 2Crafty

Hello 2Crafty friends!

For my layout today I wanted to build around a photo of my pre-teen son showing me his true smile, something that is getting a bit as he's growing up! One moment he can be showing his newfound attitude and the next one he can be the sweetest human being on earth!

With this layout, I wanted to highlight these both sides of him, combining both soft and hard elements. It's one of my simplest layouts in recent times, but I think it really allowed the vibe to come through.

"Handsome".


On the smallest circle of the "6" Circle Revolution Frames", I applied red embossing ink an then applied black embossing ink on top. On the "Mini Tags", I applied gray ink roughly and then I traced the contour with black ink. For the title, "Handsome - script", I used gray pearl metallic paint.


On the "Stars", I applied black embossing powder roughly, then dabbed red embossing ink on top so the black and the original chipboard color would stay visible in certain parts. For the "Circular Panel", I used silver embossing powder.

In this layout, I used the following 2Crafty chipboards:
Mini Tags [m00363]
Circular Panel [m00462]
6" Circle Revolution Frames [66030]
Stars [m00265] 
Handsome - script [w00511]


That's all for me today! I will be back in a few weeks with more ideas to share with you. Until then, have fun creating!


2019-05-21

"Remember moments like this" pour 2Crafty

Hello 2Crafty fans!

This week for my layout reveal I had the inspiration to create something that would push me outside my usual comfort zone. I wanted to create something that would have a vintage feel while still providing a nice freshness touch. 

I am sometimes not fully satisfied by my purely "vintage" layouts, but I'm quite pleased with the balance I struck here.

"Remember moments like this"


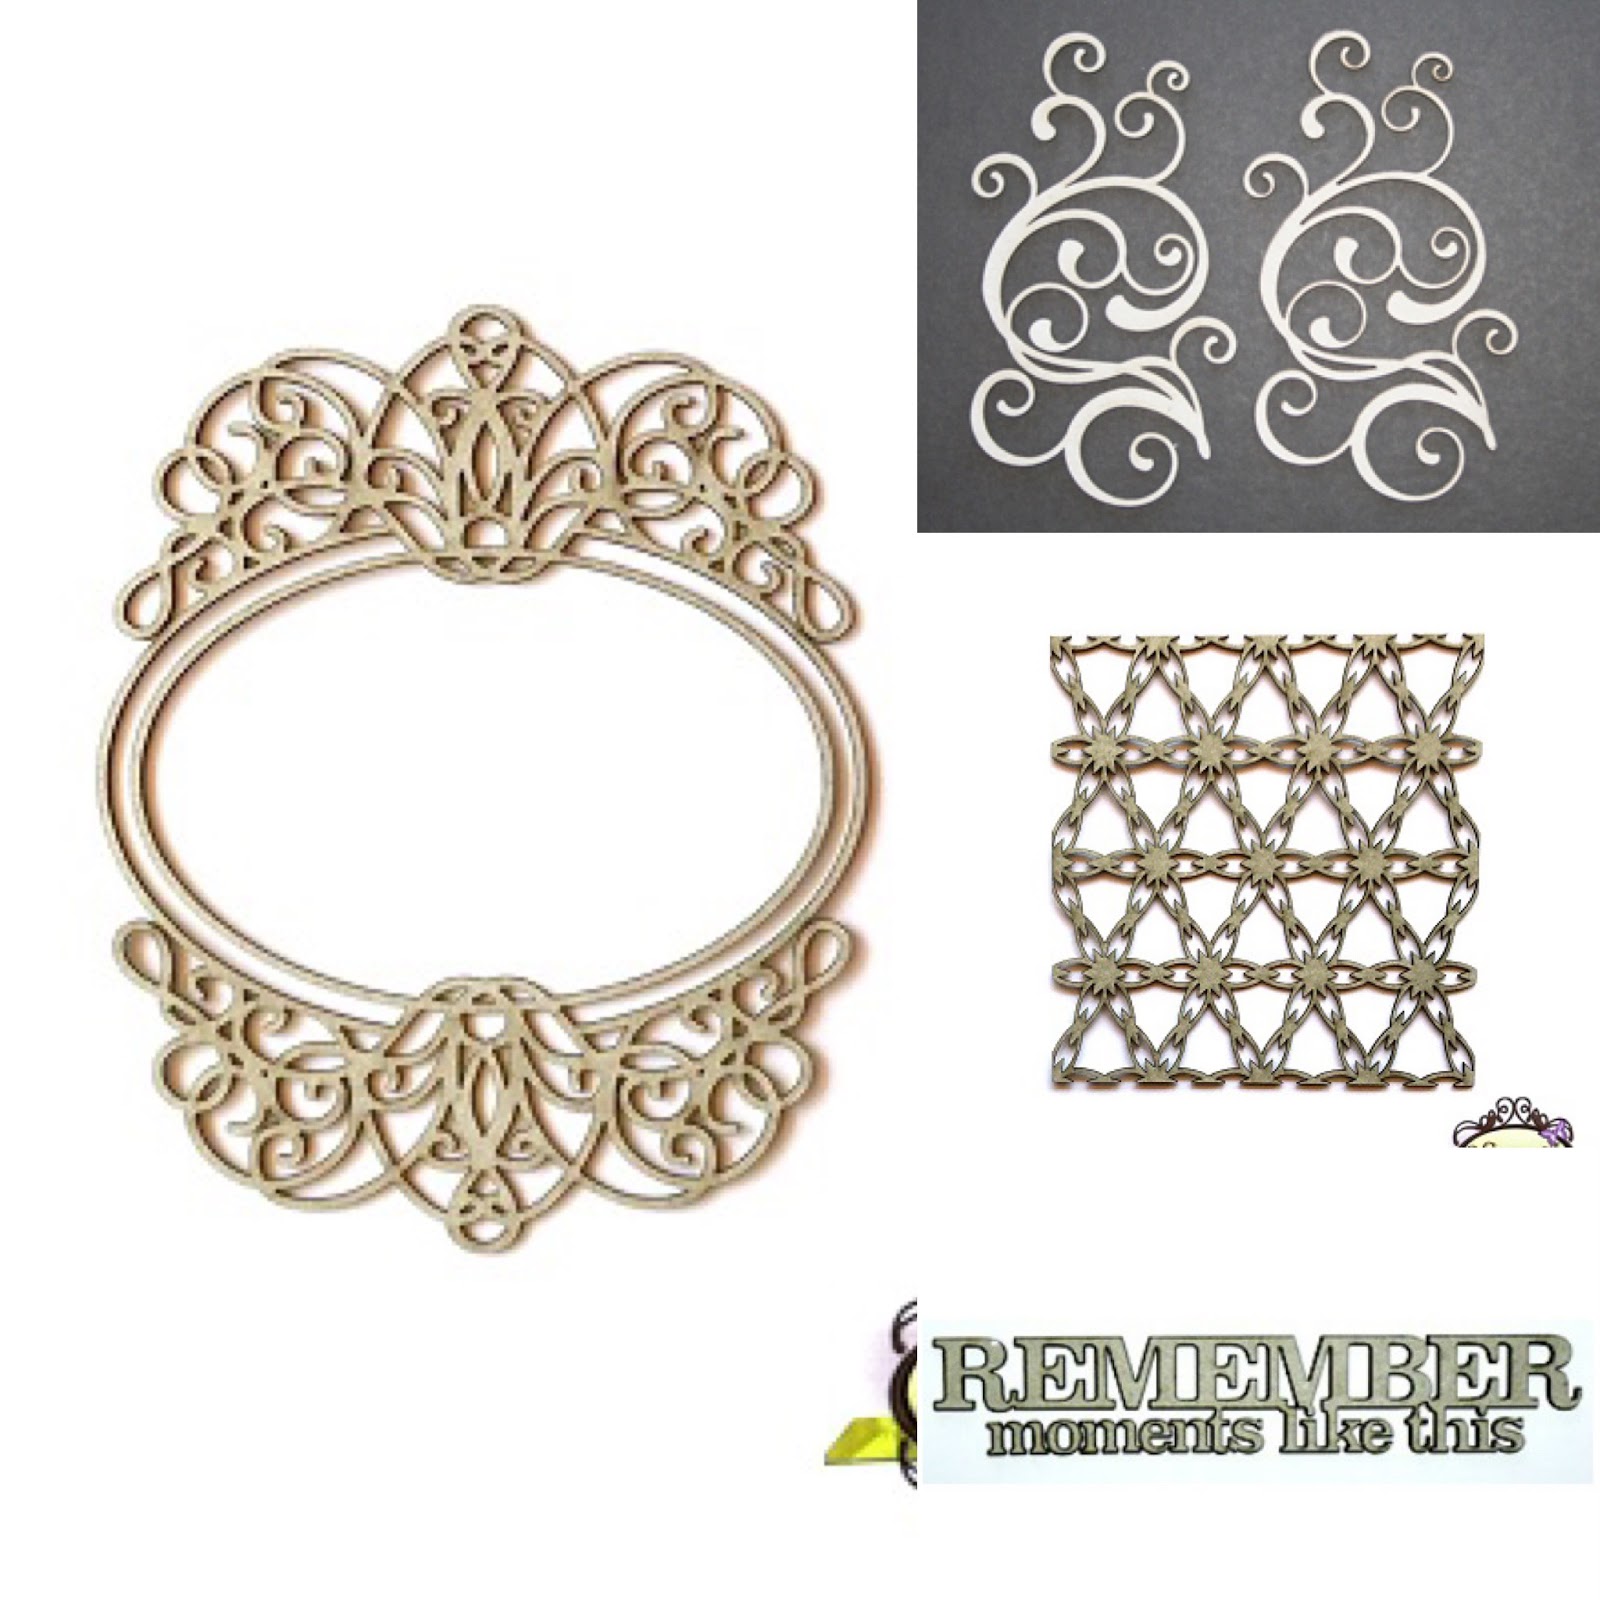
On the "Poppy's Ornate Frame", I used metallic teal embossing ink and then applied black ink on the contour.


For the "Starlink Panel" in the background, I started by cutting it to give it a rounder shape and give the impression that the stars are detached from eachother. Then I applied a pink embossing enamel powder.


On the "Brook's Swirls", I first applied pink ink and then followed by dabbing a copper embossing ink on top. Finally I applied a diluted silver glaze on top and traced the contour with black ink.


For the title, "Remember moments like this", I applied two coats of black embossing powder and some teal metallic embossing ink.

For this layout, I used the following 2Crafty chipboards:

Poppy's Ornate Frame [FR119]
Brooke's Swirls [M00428]
Starlink Panel [660046]
Remember moments like this [W00306]


I also prepared a video showing how I prepared the layout and the techniques I used for the chipboards.


That's all for me today! I hope this inspired you for your own creations. Don't hesitate to push yourself outside your comfort zone, and try mixing it up with elements you're more comfortable with! I'll be back soon with more ideas. Until then, have fun creating!


2019-05-09

"Be yourself" pour 2Crafty

 Hello 2Crafty friends,

Warm weather is finally here in Canada and we can finally enjoy outside activities again! Last summer, my son Liam discovered himself a taste for skateboarding. He has been longing for the moment where he'd be able to jump back on his board for a few months and this moment has finally arrived.

I took this picture and had an inspiration to create a layout that would capture the almost-but-not-yet-pre-teen attitude of my 10 years old boy.

"Be yourself"


I did a lot of work on the "Frame Star with Stars": I started by inking it with blue ink. Then on the center star, I applied diluted navy paint. On the side stars, I applied a white and blue embossing enamel.


On the "Retro panel", behind the picture, I used silver embossing powder and applied black embossing ink on top of it. Then I traced the border with black ink.
For the "Light bulb word set", I applied red embossing ink and put a silver glaze on top of it.


On the "Star Bubble set", I applied red embossing ink then dabbed white embossing ink on top. Finally, I've applied a silver glaze.


For the title, "Be yourself", I used a silver wax and traced the border with black ink.

On this layout, I used the following 2Crafty chipboards:
 Frame Star with Stars [FR0030]
Light Bulb word set 1 [M00803]
 Retro Panel [660042]
Star Bubble Set [M00666]
Be yourself  [W00055]


That is all for me today! I hope you enjoyed my creation and that it gave you some inspiration! I'll be back in a few weeks with more ideas to share with you. Until then, have fun creating!